
Get calendar geek right
Before you start importing or sharing your calendar, you need to verify a few technical details. Skipping these checks often leads to duplicate events, missing time zone conversions, or permission errors that are harder to fix later.
First, confirm your time zone settings. Most platforms default to local time, but syncing across regions requires a consistent reference point. Pick one time zone (usually UTC or your primary office location) and stick with it for all imported events. If you travel often, set your device to "automatic" time zone updates, but ensure the calendar app itself uses a fixed base time to avoid drift.
Next, check your privacy and sharing permissions. When sharing a calendar, decide whether you want to show only busy/free slots or full event details. Most platforms offer granular controls: "see only free/busy," "see all event details," or "make changes." For home use, "see all event details" is common for family calendars, but restrict this for shared work schedules to protect sensitive information.
Finally, verify the file format if you are importing. Google, Apple, and Microsoft Outlook support .ics (iCalendar) files. Ensure your source calendar exports in this format. Avoid proprietary formats like .csv unless you are using a specific conversion tool, as they often strip out recurrence rules and attachments. A clean .ics file preserves the structure of your events, making the sync process reliable and repeatable.
Import and share calendars across platforms
Start by gathering the public sharing links or .ics files for every calendar you need. You can usually find these in the settings menu of your primary calendar app (Google Calendar, Outlook, Apple Calendar). Look for the "Sharing" or "Integrate" tab, then copy the private address or download the subscription file.
Step 1: Add the calendar to your main account
Open your primary calendar app and select the option to add a new calendar by URL or file. Paste the public link or upload the .ics file. For Google Calendar, go to Settings > Add calendar > From URL. For Outlook, use Add Calendar > From Internet. This creates a read-only copy of the events on your main schedule.
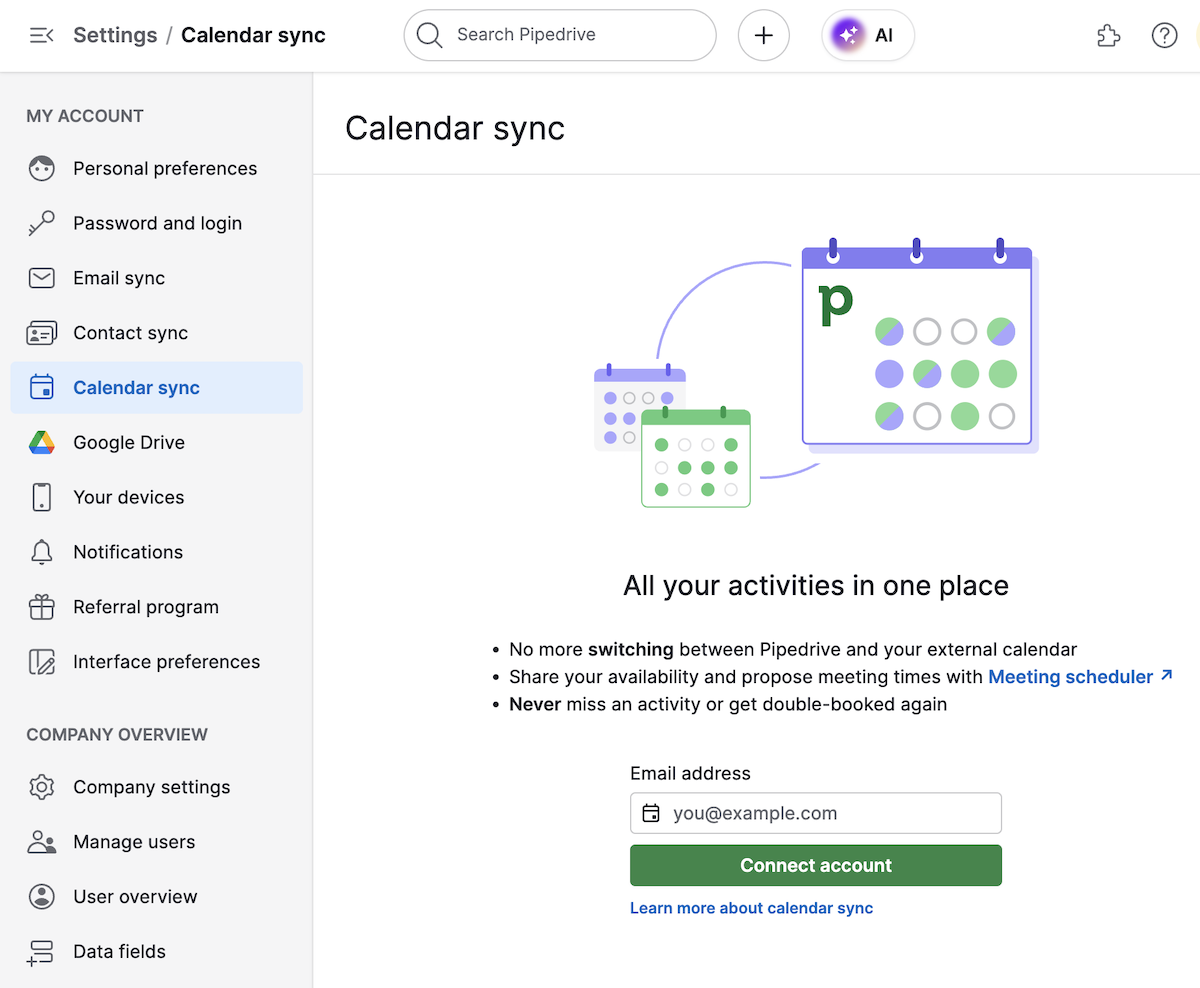
Open your primary calendar’s settings menu. Navigate to the "Add Calendar" or "Subscriptions" section. Paste the public URL or upload the downloaded .ics file. Click save or subscribe to confirm the connection.
Most platforms sync automatically, but you can adjust the refresh rate in advanced settings. Decide if you want to allow others to edit the calendar or keep it view-only. For shared family calendars, ensure the permission level matches the intended access for each user.
Navigate to your main view and check if the new calendar events are visible. Ensure the color coding matches your preferences for easy identification. If events are missing, check the time zone settings for the imported calendar to avoid scheduling conflicts.
Go back to the calendar settings and adjust notification preferences. You can choose to receive alerts for all events or only those that affect your main schedule. This prevents notification overload while keeping you informed of important shared dates.
Create a test event in the shared calendar or ask a collaborator to add one. Check if it appears in your main view within the expected sync window. This confirms that the connection is stable and that permissions are working as intended.
Step 2: Handle common syncing issues
If events don’t appear, check your internet connection and calendar permissions. Sometimes, the .ics file format isn’t fully supported by all platforms, leading to missing details. In those cases, stick to public URLs for better compatibility. Also, ensure that the time zones for both the source and destination calendars match to avoid off-by-one-day errors.
-
Verify the public URL is still active
-
Check that time zones match between calendars
-
Confirm notification settings are enabled
-
Test with a sample event to ensure sync
Fix common mistakes
Syncing calendars across platforms seems straightforward until events start vanishing or double-booking occurs. Most syncing failures stem from configuration errors rather than platform bugs. By correcting these specific setup habits, you can prevent the majority of calendar sync issues.
Overlooking time zone settings
The most frequent cause of "missing" meetings is a mismatch between the calendar's default time zone and your current location. When you import a calendar from a different region, it often retains the original creator's time zone. This results in events appearing at incorrect local times, making you late for calls or meetings.
Always verify the time zone setting immediately after importing a new calendar. Most platforms allow you to view the calendar in your local time zone without changing the source data. If an event looks wrong, check the individual event details first; if the time zone is hard-coded there, you may need to adjust the calendar's global settings or contact the organizer.
Ignoring permission levels
Sharing a calendar link does not guarantee that others can edit or view it correctly. Many users assume that "sharing" means full access, but default settings often restrict viewers to "see only" or "see only free/busy" status. This leads to confusion when collaborators try to add events but receive error messages or find their changes invisible to others.
Before sharing, explicitly choose the correct permission level. Use "make changes to events" for team members who need to add or modify dates, and "make changes and manage sharing" only for trusted administrators. Double-check these settings after sending the invite, as some platforms revert to read-only defaults if the recipient's account type doesn't support full editing.
Mixing personal and work calendars
Importing work calendars into your personal app, or vice versa, creates visual clutter and privacy risks. When you merge these into a single view, important deadlines can get lost in a sea of personal reminders, and sensitive work events might become visible to family members sharing the device.
Keep work and personal calendars separate in your primary view. Use the "overlay" feature to view them together only when necessary, rather than merging them into one data source. This maintains clear boundaries and ensures that privacy settings for each calendar remain intact and effective.
Calendar geek: what to check next
These are the practical questions people ask right before they commit to a syncing setup. The answers focus on what actually works in daily life, not just theoretical features.
No comments yet. Be the first to share your thoughts!