
Syncing calendars vs sharing them
Understanding the difference between syncing and sharing prevents accidental double-booking and privacy leaks. Sharing is like handing someone a photocopy of your schedule; they can see what’s on your calendar, but they can’t change it. Syncing is like having two identical whiteboards where writing on one instantly appears on the other.
Sharing: View-Only Access
When you share a calendar, you grant others permission to view your events. This is ideal for letting family members know your availability or allowing a manager to see your work hours without editing them. The shared calendar remains read-only for the recipient. If you delete an event, it disappears from the shared view, but the recipient cannot add or modify your existing entries.
Syncing: Two-Way Duplication
Syncing duplicates events across multiple calendars. According to Calendar Sync, true syncing means events are identical across all connected calendars. This is useful when you want a unified view of your life, such as combining work, personal, and holiday calendars into one master schedule. Changes made in one calendar reflect in the others, ensuring consistency.
Choose sharing for privacy and control. Choose syncing for convenience and a comprehensive overview of your time.
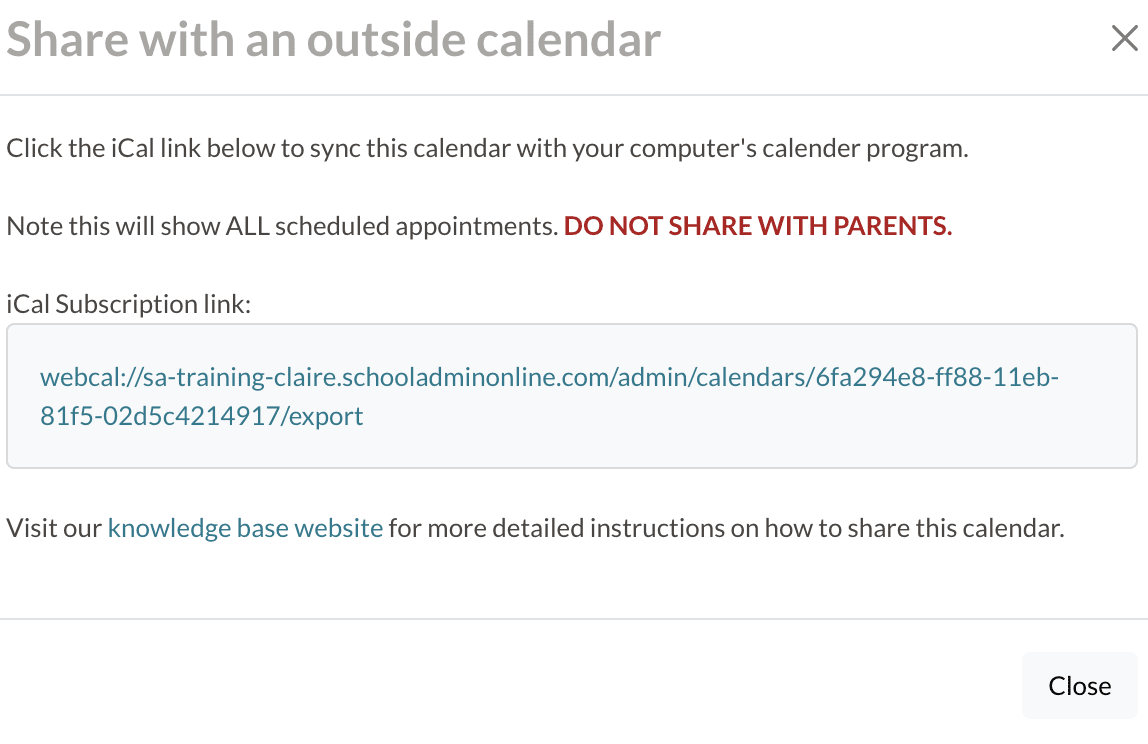
Import calendars from other platforms
Calendar Syncing works best as a clear sequence: define the constraint, compare the realistic options, test the tradeoff, and choose the path with the fewest hidden costs. That order keeps the advice usable instead of decorative. After each step, pause long enough to check whether the recommendation still fits the reader's actual situation. If it depends on perfect timing, unusual access, or a best-case budget, include a simpler fallback.
Share calendars for team visibility
Sharing a calendar moves your schedule from a personal tool into a team asset. When colleagues can see your availability, they stop guessing and start booking. This reduces the back-and-forth of finding open slots and keeps everyone aligned on deadlines.
The process is straightforward. Open your calendar settings and locate the "Share with specific people" or "Integrate calendar" option. Enter the email addresses of the people you want to invite. Most platforms, including Google Calendar and Microsoft Outlook, allow you to share individual calendars or merge multiple views into one dashboard.
Permission levels are your control mechanism. Start with "See only free/busy" for external contacts or large teams. This protects your privacy while still allowing others to book you. Reserve "See all event details" for close collaborators who need context. Only grant "Make changes" to trusted assistants or project leads who actively manage your schedule.
Once shared, your calendar becomes a single source of truth. Team members can plan around your availability without asking. This visibility is essential for collaborative scheduling, ensuring that meetings happen when everyone is actually free.
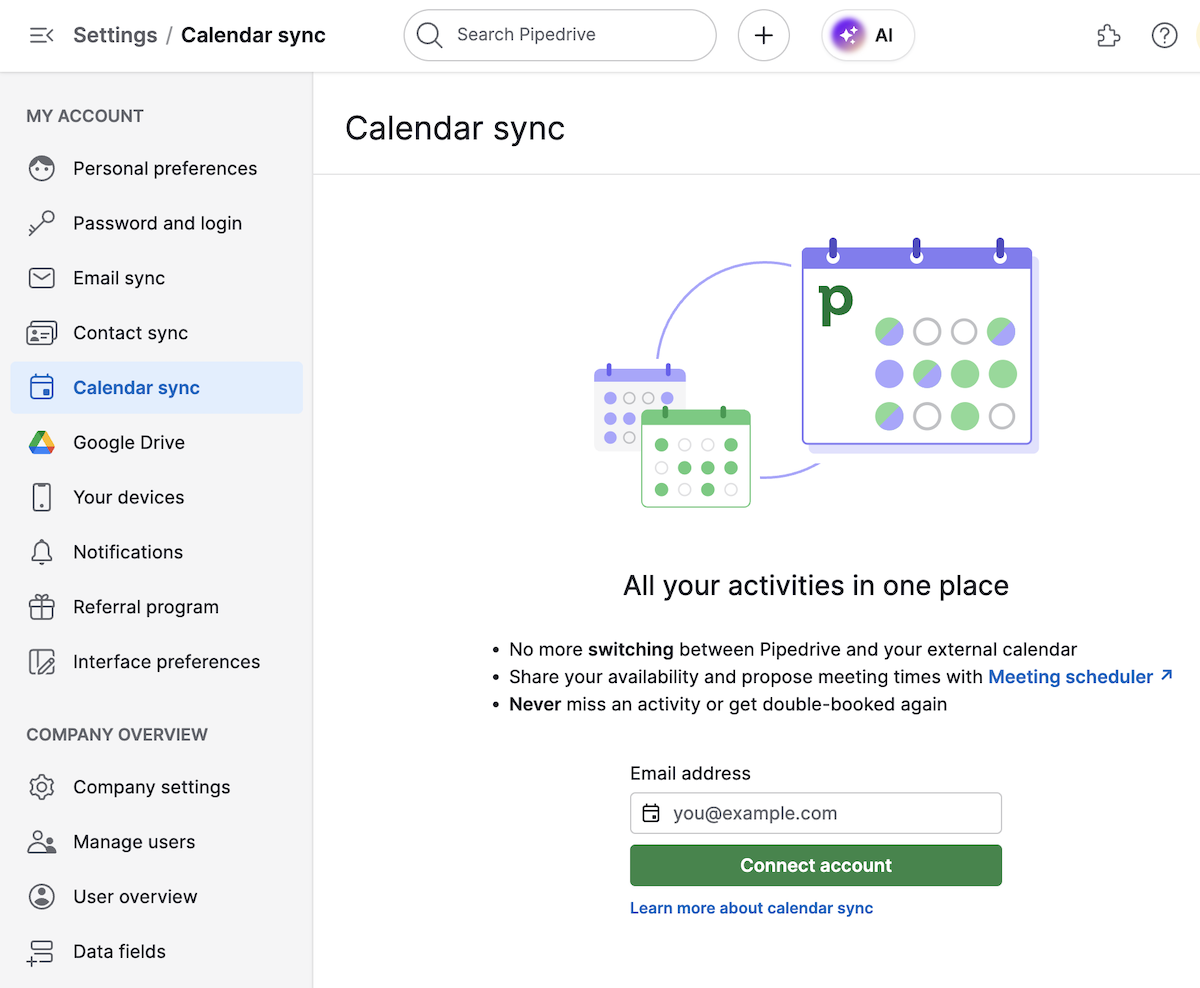
Automate syncing with third-party tools
When native platform integrations fall short, third-party automation tools bridge the gap. These services enable real-time, two-way synchronization between calendars that otherwise don't talk to each other. Instead of manually copying events from a work calendar to a personal one, an automation layer keeps both updated simultaneously.
The most effective method for this is batch syncing. Rather than syncing events one by one, which can lead to conflicts or missed updates, batch sync processes a collection of events in a single operation. This ensures consistency across all connected accounts and reduces the risk of data errors. Tools like Calendar Bridge specialize in this approach, allowing you to set up a "one-click" solution that runs in the background.
To get started, you will need to authorize the third-party tool with each calendar provider. This usually involves logging in to Google, Outlook, or Apple Calendar through the tool's secure portal. Once connected, you select which calendars to sync and define the direction of the sync (one-way or two-way). After configuration, the tool begins the initial batch sync, which may take a few minutes depending on the volume of events.
For users managing multiple calendars across different platforms, this automation removes the friction of manual management. It ensures that your schedule remains accurate without requiring constant attention. If you encounter issues with specific events not appearing, check the tool's sync log to verify that the connection remains active and that no permissions have expired.
Fix syncing errors and delays
When calendar syncing errors and delays disrupt your schedule, start with the simplest fix: a manual resync. This forces the application to pull the latest data from the server, often clearing temporary glitches that cause events to appear late or not at all.
If a manual refresh doesn’t work, check your account permissions. Ensure that calendar sync is enabled in your device settings. For Android users, go to Settings > Accounts > Google > Account sync and toggle Calendar on. On iOS, verify that the Calendar app has permission to access your accounts in Settings > Privacy > Calendar.
For persistent issues, review the source application’s sync settings. Some platforms offer basic and advanced sync modes; switching between them can resolve conflicts. If problems continue, consult the provider’s official support documentation for platform-specific troubleshooting steps.
Calendar Syncing Checklist
Before relying on your integrated schedule, run through this verification list to ensure your calendar syncing is stable and accurate. This final check confirms that events are flowing correctly between your platforms.
- Verify two-way sync status: Confirm that changes made on mobile devices appear on your desktop in real time.
- Check import completeness: Open your newly imported calendar to ensure no events were skipped during the transfer.
- Test permission settings: Ensure shared calendars are set to read/write if you need to edit events directly.
- Confirm time zone alignment: Verify that all connected accounts use the same time zone to prevent scheduling conflicts.
Common calendar sync: what to check next
When your events stop updating, a quick resync usually fixes the disconnect. This section covers the most frequent hiccups and how to resolve them.
No comments yet. Be the first to share your thoughts!